
Introduction:
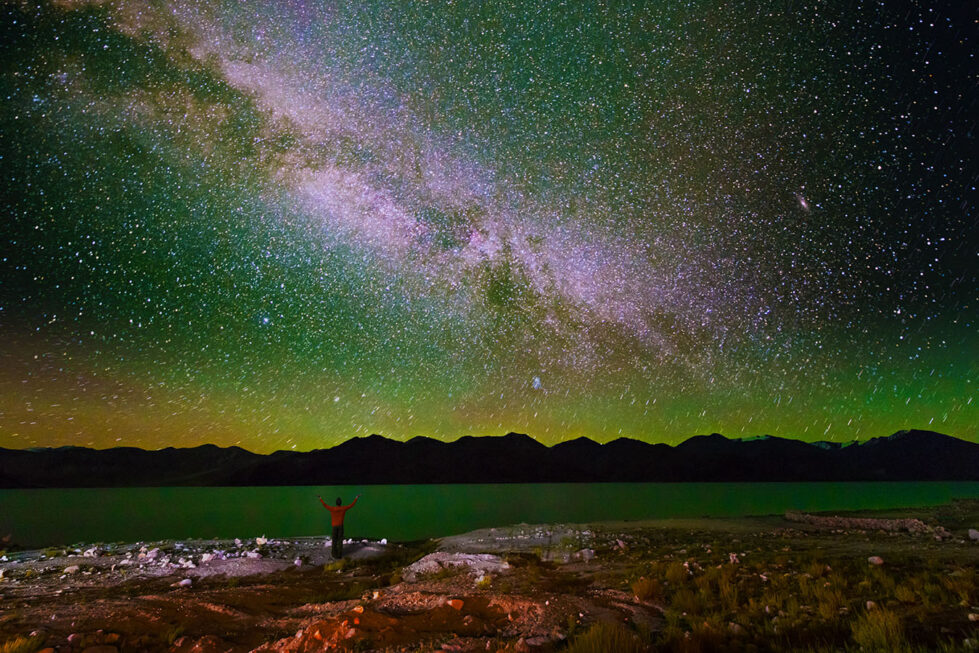
Photographing stars has always been an awe-inspiring pursuit for photographers and stargazers alike. The night sky offers a mesmerizing canvas of twinkling stars, distant galaxies, and celestial phenomena, all waiting to be captured through the lens of a camera. However, photographing stars requires careful planning, technical knowledge, and a dash of creativity. In this comprehensive guide, we will delve into the world of astrophotography and explore the techniques, equipment, and tips necessary to create stunning images of the cosmos. “You really want something in the frame to anchor the photo,” photographer Jeff Carlson says, “Whether it's trees or a landmark in the foreground, you want to have something that's going to frame the sky so that it doesn't just look a scene from a space film.”
Understanding Astrophotography:

Astrophotography involves capturing the celestial wonders of the night sky, including stars, constellations, the Milky Way, and even deep space objects like nebulae and galaxies. This unique genre of photography requires a blend of scientific knowledge and artistic vision to create captivating images that convey the immense beauty and mystery of the universe.
Light painting: Light painting is a popular technique that many photographers use to great effect and not just with the night sky. Light paintings are long exposures that cause points of light to blur and travel, creating interesting photographs that are scribbled with light. Many astrophotographers use this method to capture the rotation of the Earth through the movement of the points of light of the stars.
Time lapse: Time-lapse astrophotography is the process of setting up a camera to take photos at regular intervals and then combining those photos into a video, so you can see movements over a long period of time. If you’ve ever seen a video of the sun rising really fast, you’ve seen time-lapse photos.
Starscapes: Capturing a massive view of the stars requires equipment and know-how, but the results can be spectacular, producing views of the stars that you’d be otherwise unable to capture with the naked eye.
Close-ups: Using a telescope, you can take truly spectacular images of celestial bodies. This style of photography requires a bit more equipment than your standard photo adventure.
Essential Equipment:
 Camera: A DSLR or mirrorless camera with manual control settings and good low-light performance is crucial for astrophotography. Full-frame sensors tend to perform better in capturing stars due to their larger pixel size and lower noise levels.
“If you want to do astrophotography or night photography, you want cameras with larger sensors.”
 Lens: A wide-angle lens with a fast aperture (f/2.8 or wider) is ideal for capturing expansive views of the night sky. Lenses with a focal length between 14mm and 35mm are popular choices as they provide a broad perspective and allow for longer exposure times without star trails.
 Tripod: A sturdy tripod is essential for keeping your camera steady during long exposures. Look for a tripod that can handle the weight of your camera and lens and has the flexibility to adjust its height and angle.
 Remote Shutter Release: A remote shutter release or intervalometer allows you to trigger the camera without touching it, reducing the risk of introducing camera shake during long exposures. Additionally the intervalometer will allow you to take several photos over a period of time so that you can collate them into a star trails photo.
 Battery: A good, fully charged battery too is required, as if you run out of juice during the shoot then you’ll see gaps in your trails while you’re changing over and not shooting.
Planning and Location:
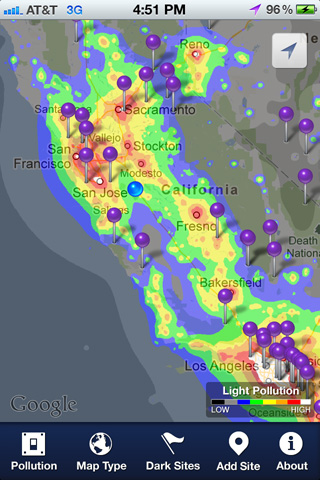
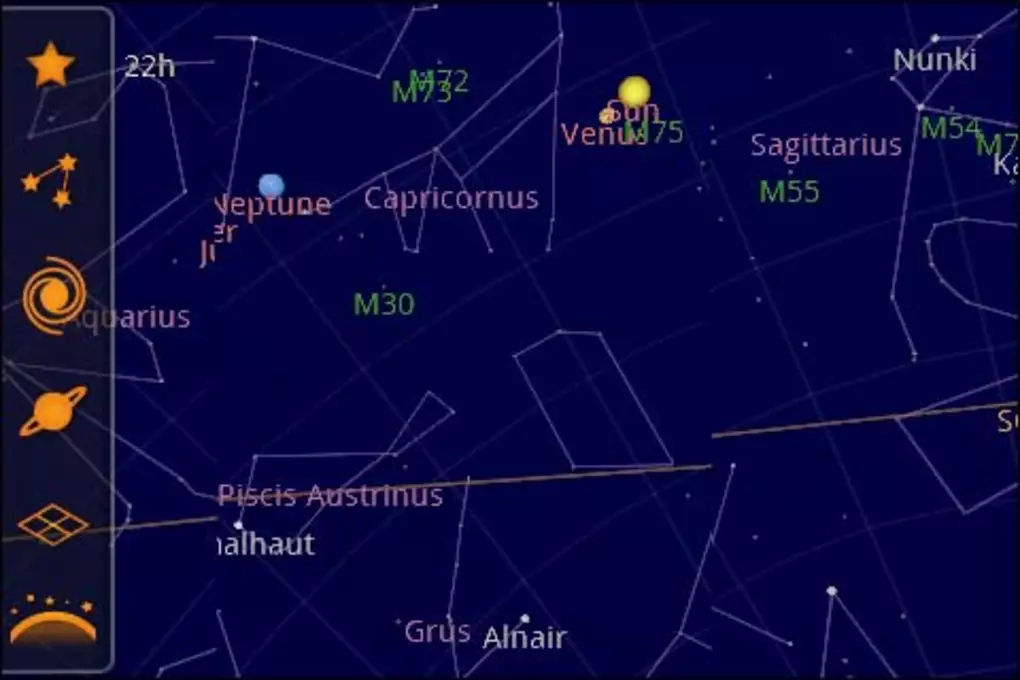
Dark Sky Locations: Find a location away from light pollution to minimize unwanted ambient light and enhance the visibility of stars. Websites and apps like Sky Map App, Dark Sky Finder and Clear Outside can help identify areas with minimal light pollution.
Research Celestial Events: Keep track of celestial events like meteor showers, eclipses, or phases of the moon. Such events can add depth and interest to your starry images.
Weather Conditions: Check the weather forecast for clear skies, as clouds can obstruct your view of the stars. Timing your photography session during a new moon phase can ensure a darker sky with more visible stars. This factor is totally out of your control and you could at best pray for good weather.
Camera Settings:
Manual Mode: Switch your camera to Manual mode to have full control over settings like aperture, shutter speed, and ISO.
Aperture: Use the widest aperture available on your lens (e.g., f/2.8) to gather as much light as possible. A wider aperture also helps in creating a shallow depth of field and isolating specific elements in the frame.
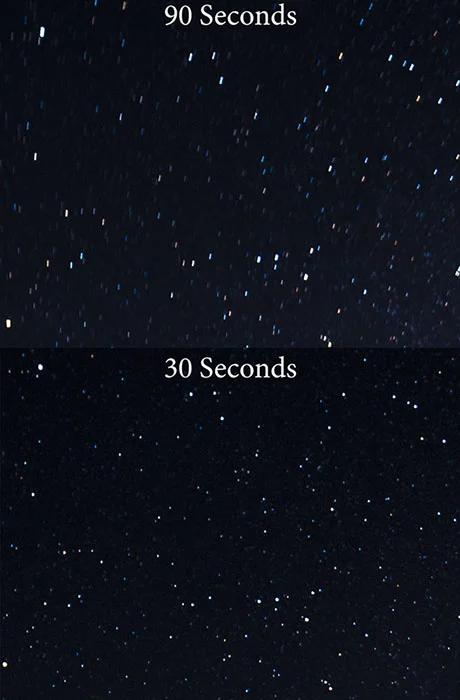
Shutter Speed: Experiment with longer exposures to capture the faint details of stars and celestial objects. Start with exposures of 15 to 30 seconds and increase the duration if necessary. Avoid exposures longer than 30 seconds if you want to avoid noticeable star trails.
ISO: Begin with a relatively high ISO (e.g., 1600 or 3200) and adjust accordingly based on the ambient light conditions. Be cautious not to set the ISO too high, as it can introduce noise into your images.
White Balance: Set your white balance to "Daylight" or use a custom white balance setting to maintain the natural colors of the stars.
Histogram: Check the histogram of your image on the back LCD of your camera to ensure that you have the correct exposure. LCD monitor settings may be off and can result in a wrong exposure being displayed.
Avoiding Star Trails:
Due to the rotation of the Earth, it appears as though the stars are moving through the sky in long exposures. To achieve points of light you can use a simple rule that’s often called the “500 Rule”.
Here’s the 500 Rule:
500 Divided By the Focal Length of Your Lens = The Longest Exposure (in Seconds) Before Stars Start to “Trail”
For example; let’s say you’re taking a shot with a 24mm lens on a full frame camera.
500 / 24 = 21 seconds, which you can round to 20 seconds.
Use the following table as a ready reference:
|
DSLR |
Seconds before which stars blur |
|||
|
Focal Length |
Full Frame |
Nikon 1.5 Crop |
Canon 1.6 Crop |
|
|
10 |
N/A |
33 | 31 | |
|
14 |
36 |
24 |
23 |
|
|
16 |
31 |
21 |
19 |
|
|
20 |
25 |
17 |
16 |
|
|
24 |
21 |
14 |
13 |
|
|
28 |
18 |
12 |
11 |
|
|
35 |
14 |
9 |
9 |
|
|
60 |
8 |
5 |
5 |
|
|
70 |
7 |
5 |
4 |
|
|
85 |
6 |
4 |
4 |
|
Megapixels have no effect on the 500 rule. When you print, the star trails will be the same size. What it really comes down to is how big you are going to print and what the viewing distance is. This will determine how long your trails can be.
Focusing:
Manual Focus: Switch your lens to manual focus and focus at infinity. Use the live view mode on your camera and zoom in on a bright star or distant object to fine-tune the focus manually.
Focus Stacking: For images that require both foreground and stars to be in sharp focus, consider focus stacking. Capture one set of images focused on the foreground and another set focused on the stars. Combine them later in post-processing for a crisp, well-focused image.
Composition:
Foreground Interest: Incorporate elements of interest in the foreground, such as trees, mountains, or architectural structures. This adds depth and context to your starry landscapes. Use light painting techniques to brighten up your foreground elements. A powerful torch or the headlights of your car are useful accessories.
Rule of Thirds: Compose your image using the rule of thirds, placing the horizon or other prominent features on the gridlines to create a balanced and visually appealing composition.
Leading Lines: Utilize natural or human-made leading lines to guide the viewer's eye toward the stars, creating a sense of depth and visual engagement.
Post-Processing:
Raw Format: Shoot in RAW format to have maximum control over post-processing adjustments, including exposure, white balance, and noise reduction.
Noise Reduction: Utilize noise reduction techniques during post-processing to minimize noise while retaining important details. Be cautious not to overdo it, as excessive noise reduction can lead to loss of fine details.
Enhancing Details: Use software like Adobe Photoshop or Lightroom to adjust exposure, contrast, and color balance. Apply selective adjustments to bring out the subtle details of stars and other celestial objects.
Stacking and Stitching: Advanced techniques like image stacking and panorama stitching can be used to create ultra-high-resolution images or to capture multiple exposures for reducing noise or enhancing dynamic range.
Conclusion:
Photographing stars offers a gateway to exploring the mysteries of the universe and creating breathtaking images that inspire wonder and awe. With the right equipment, careful planning, and technical knowledge, you can capture the celestial beauty that often goes unnoticed in our busy lives. Remember to experiment, be patient, and embrace the challenges and rewards that come with astrophotography. So, venture out into the darkness, set up your tripod, and unveil the enchanting splendor of the starry night sky through the lens of your camera.

Brendan Dias
Professional Photographer
Brendan Dias is a self-taught professional photographer and professional trainer for Adobe Camera Raw, Photoshop CC and Lightroom CC with more than 15 years of experience in photography and training.